Info & International Orders: 317-873-1316

FAQ
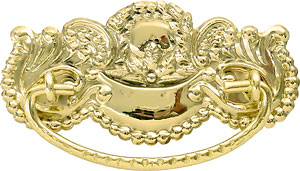
What does all the different types of brass mean?
Are The Flour & Sugar Bins Safe To Use?
Where can I get a Porcelain Work Top?
What is the best way to restore the tambour door?
What Kind Of Cabinet Do I Have?
How do I make my new hardware look as old as the furniture I put it on?
Which skeleton key will fit my lock?
How can I tell if the screw holes will line up?
What does all the different types of brass mean?
Many times when you see a description for a brass product you will see terms such as stamped, cast, wrought and extruded. We receive many inquiries from people wanting to know what these terms actually mean.
These are terms used to describe how the product was manufactured. They also will tell you in what ways the product can be used. For example, some stamped brass back plates for restoration drawer pulls are thin enough to be flexible and mold to a bowed drawer front.
Stamped:
Stamping is a metalworking process by which sheet metal strips are punched using a press tool which is loaded on a machine press or stamping press to form the sheet into a desired shape. This could be a single stage operation where every stroke of the press produce the desired form on the sheet metal part, or could occur through a series of stages.
Cast:
A metal-forming process whereby molten metal is poured into a cavity or mold and, when cooled, solidifies and takes on the characteristic shape of the mold.
Wrought:
Wrought is the process of forging or hammering the raw product into shape. This can be done by hand with a hammer or with a stamping press where the material is pounded into it’s form.
Extruded:
Extrusion is a manufacturing process used to create long objects of a fixed cross-sectional profile. A material, often in the form of a billet, is pushed and/or drawn through a die of the desired profile shape. Hollow sections are usually extruded by placing a pin or piercing mandrel inside of the die, and in some cases positive pressure is applied to the internal cavities through the pin. Extrusion may be continuous (producing indefinitely long material) or semi-continuous (producing many short pieces). Some materials are hot drawn while others may be cold drawn.
Are The Flour & Sugar Bins Safe To Use?
The answer to this would depend on your definition of safe. You should first realize that these bins are not airtight. For the sugar bin, this can be quite a bad thing in areas of the country with high humidity. Imagine opening the sieve to release the sugar and nothing comes out because it is one huge sugar cube! For the flour bin this gives access for bugs such as moths and meal bugs.
The next problem is what the bins are made of tin plated steel. To keep the bins from rusting we apply a fine coat of oil as we manufacture them. Since I am sure that you do not want oil in your flour, your first thought might be to wash the bin. If every nook and cranny is not fully dried, you will have a very orange bin the next day as the rusting process begins.
The typical response that we hear even after being told all of this is, “Well my Grandmother used hers for years with no problem.” While this may be true, we have become much better health educated in the last 80 years. We used to have mercury in our light switches, and lead in our paint too. We also live much longer today than we did 80 years ago.
Porcelain Work Tops
In mid 2007 the company that had been making porcelain work tops since the early 1900’s was finally closed down. Although sales of the tops had been slow the last couple of years, we were surprised by the number of inquiries for them. We spent a great deal of time tracking down companies that had the ability to make them. At one point we even considered bringing them in from overseas. The prospect of producing these again were becoming increasingly slim when you consider the cost of steel rising as well as the fuel for the kiln and trucking it in. Many of you have asked for ideas on alternatives, so let me give you the short list.
Find an Old Porcelain Table:
Flea markets or antique malls are a great place to start. Write down
the size you need put it in your wallet, throw a tape measure in the
glove box and keep your eyes open.
Butcher Block:
You can make your own butcher block style top. it is best to do this
out of hard maple but be warned as the is a heavy top.
Modern Top:
There are also many modern alternatives such as corian, melamine, tile
and even aluminum. Whatever you decide to use make sure that it is
not too thick or heavy and is safe with foods.
What is the best way to restore the tambour door?
The first thing you need to do even before removing the old cloth is number your slats. The slats have been glued next to one another for decades and have conformed to each others shape, curve and warps. Once you have the slats number you can begin to scrape off the old cloth. The glue is most likely a hide glue and is very hard. Many times we will use a belt sander to remove the old glue. If you do this be very careful to keep the surface of the slat even.
Once all the slats are free of the old glue and you have a clean back surface you will need to make a jig to hold the slats in place when gluing on the new cloth. You need to pay close attention that the jig is square and that you have 90 degree angles. This can be something as simple as a scrap piece of plywood with strips of wood screwed to it forming 90 degree angles.
Take your new tambour webbing and cut your strips about one inch longer than the width of the door. The excess will be trimmed off later, but will allow for some shrinkage of the cloth. Next you need to apply the glue to the cloth.
You can use many different glues but if you want to save yourself hours of frustration we highly recommend that you use our tambour glue. Wood and cloth absorb liquids at different rates. Most glues are absorbed totally by the cloth before they adhere to the wood. To overcome this problem you need to apply enough glue so that it is not all absorbed by the cloth. Our glue also remains flexible after it is cured which helps improve the rolling of the tambour door.
When you apply the strips to the back of the slats it is best to use a tool such as a wallpaper roller. This will ensure glue contact to all of the surface under the tambour tape. Once all of your strips of tambour tape are in place cover them with wax paper and then another piece of plywood. Place a weight on top of the plywood such as a cement block or case of sodas and let it dry overnight. Once dry trim off the excess cloth and you are ready to re-install your door.
What Kind Of Cabinet Do I Have?
Almost every day someone will say, “I have a cabinet with three doors across the top, a porcelain top, three drawers and a door on the base, who made it?” That description covers about 90% of all the cabinets made and is akin to saying, “I have a car with four wheels, two doors, a trunk and a hood, who made it?”
Most people do not realize that there were over forty different manufacturers with some making 20-30 models per year. You also had companies like Sears and Wards that put their names on cabinets made by companies like Napanee and Sellers. Many factors such as construction of the cabinet, hardware and locations of accessories need to be taken into consideration when trying to identify a cabinet. The book Hoosier Cabinets goes a long way towards identifying and restoring these old cabinets.
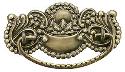
New Hardware Old Look
On most antiques, bright and shiny hardware just doesn’t look right. While there are several ways to age the hardware we have found specialized aging solutions do the best and most consistent job. The video below will show you how easy it is to use our brass ager to make new hardware look decades old.
|
Your browser does not support the video tag. |
For Brass try easy to use Brass Ager:

For Nickel try easy to use Nickel Ager:

Which skeleton key will fit my lock?
The only way this question can be answered is through trial and error. This is why we offer two different key rings with several different keys. The smaller set KY-10S has ten different common keys and will work most of the time. The larger set KY-20S has 19 different keys and includes solid brass blanks that can be filed to work most locks.
How can I tell if the screw holes will line up?
The simple answer to this is you can't and they shouldn't. If a door has been hanging on a cabinet for 80+ years, it can be safe to say that it is no longer in alignment. Even if you were putting the old hardware back on the screw holes should be filled with wood putty or a sawdust and glue slurry. Then you doors should be re-aligned and the holes for the hinge and latch screws should be drilled accordingly. The explanation holds true for doors but can be applied in principle to most any piece of antique furniture that has expanded and contracted over the years as well as warped.
CUSTOMER SERVICE
INFORMATION
MY ACCOUNT
CONTACT US
-
ADDRESS:
Kennedy Hardware
10655 Andrade Drive, Zionsville
46077, Indiana
United States -
TELEPHONE:
317-873-1316 -
EMAIL
Contact Us


Copyright © 1983-2024 Kennedy Hardware